| How to make an magnifying effect and a magnifying glass to go whit it =) |
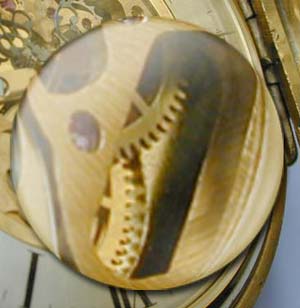
| Ok start by opening the picture that you want the magnify, magnifying glass effect on. |
|
|
|
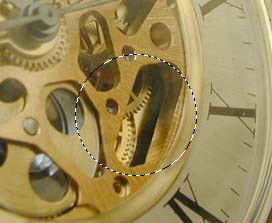
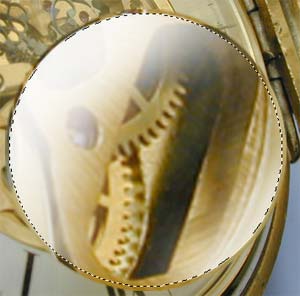
Make a selection with the Elliptical marquee tool by holding the shift+Alt key down, to make a perfect circle. When you have the area that you want to magnify, selected left click inside the selection and choose layer via copy, (this layer will be referred to as the magnify layer in the rest of the tutorial, just so that you know. If you like, feel free to name your layers to make it easier for you know which layer is which. I do it some times, but not all the time when I work in PS. |
| Select the new layer that was created, with a copy of the area you selected, then press Ctrl-T, to go in to free transform mode. Hold down the alt and shift key, and drag one of the corners outwards
to enlarge it. The bigger you make it, the bigger magnification, but don't make it to big or it will look like crap! =) |
|
|
|
Make a selection around your magnify
layer, by holding the Ctrl button and left clicking the layer in the
layer palette. |
|
|
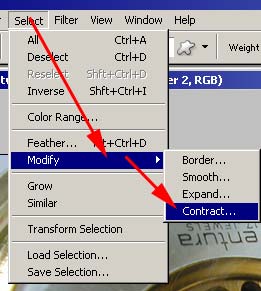
Ok, let’s create some highlights for your magnification. With the selections still there, create a new layer. Ok, now we are going to contract the selection a little bit by going
|
|
|
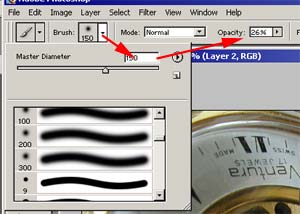
Make sure you have your new layer selected
and white as your foreground color, then pick the brush tool and a
large and soft brush. |
|
|
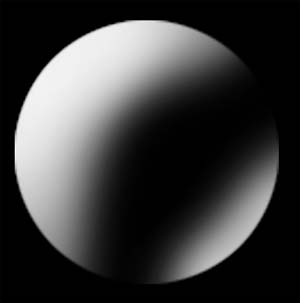
Start drawing your highlight out with
the soft brush, and with white as your color. Here’s the same highlight as above, on a black background,
so you can see it more clearly. |
|
|
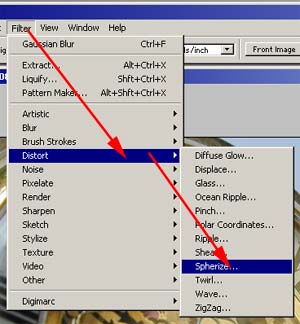
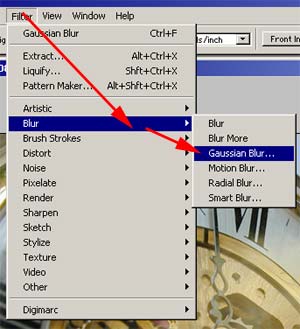
Now we are going to Gaussian blur the
highlights, to get rid of that sharp edge. You do that by Filter /
Blur / Gaussian Blur. When you have blurred it, then lower the opacity of the highlights
layer to make it blend in better. |
|
|
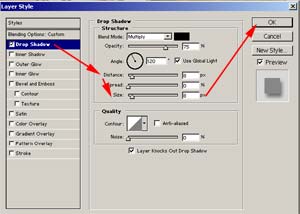
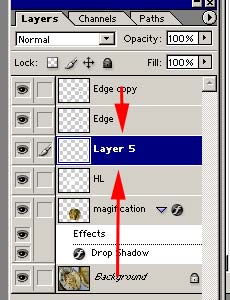
Time to add a Drop shadow to get some more deep in the picture. Now we add a drop shadow, to get more depth in the picture. Double click the magnification layer; it should pop up a window like, the one to the left. Check the drop shadow check box by clicking it, (make sure to highlight it like in the picture). As you see, there are quite a lot of things to change, but the main thing you need to care about for this tut are: Angle, set this so that it matches your highlight, (like in the picture
to the left). Ok that takes care of the magnification part. So if you don't want the magnifying glass then you are done. If you want the magnifying glass then read on. |
| Now it’s time to add the magnifying glass. |
|
| Start by adding a new layer at the top, and make a selection of the magnification layer again, if you have deselected it, by Ctrl left clicking the magnification layer. |
|
|
|
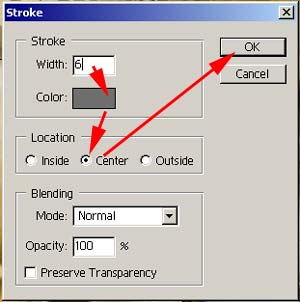
Now where are going to use stroke to create the
metal edge of the magnifying glass. Then press the Ok button. Then i stroked it again whit Then press the ok button. Then I stroked it again with, Once more with You may want to use higher numbers for the width of stroke if you want a really large magnifying glass, maybe some more strokes, (i.e. 12 on the first, then 6, 3, 1 or something like that.). You can also use lighting effects, but that will have to be another tutorial. |
| Then I duplicated the layer we just created by left clicking, and choosing duplicate layer. Then I scaled it down some, by pressing Ctrl-T and then hold the Alt+Shift and with the left mouse button, drag one of the corners in about 4-8 pixels to reduce its size. |
|
|
|
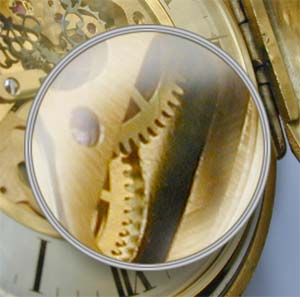
This is how my picture looks now, and you should have something similar. |
|
|
Time to make the handle. Create a new layer above the magnify layer, and highlight the layer and under the metallic edge layers, |
|
|
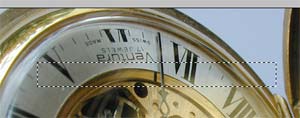
make a selection with the size that you want your handle. |
|
|
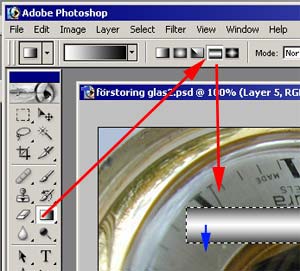
Choose the gradient tool, and the reflected gradient method, (as seen in the picture to the left.). Then drag from the center of the selection, and out, I dragged like the blue arrow shows, make sure you have white as your foreground color. |
|
|
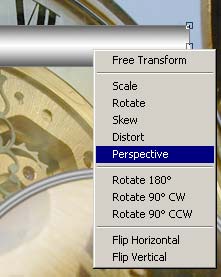
Select your handle layer and Press Ctrl-T to go in to free transform mode, and then click the right mouse button and a menu should pop up, there choose perspective. Hold down the Alt key and Drag on of the corners down a few pixels. |
|
|
Duplicate the handle layer by right clicking it and choosing duplicate layer, and then choose the new layer that was created. Press Ctrl-T, then drag the left handle in a few pixels, then by holding the alt button, and dragging the middle handle outwards, making it wider. Press enter to get out of free form mode. Now by Pressing Ctl-U, I made my handle darker by lowering the lightness slider to about -70. We are going to merge the two layers together by pressing Ctrl-E, make sure that you have the layer that we just changed and that it’s above the other handle layer. |
|
|
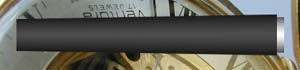
My handle looks like the picture to the left, and yours should look something similar. |
|
|
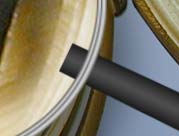
Time to move the handle in place. |
|
|
When you have finished placing it, put it as shown in the picture. So that it sticks right out from one side. That part that shows on the inside are we going to cut out in the next step =) |
|
|
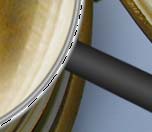
OK, now simply Ctrl click the
magnify layer to get a selection of it, make sure that you have the
handle layer selected, hit the delete key. Almost done! Now just one small step left. |
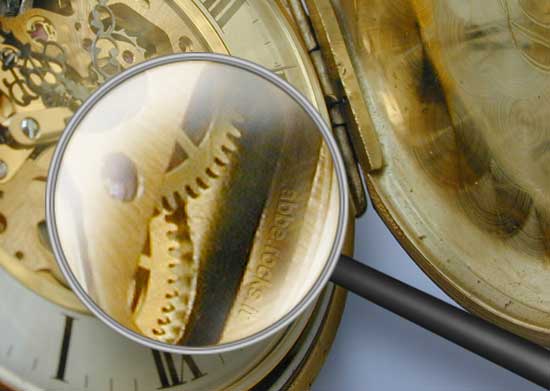
| Ok, right click the magnify layer, and choose copy layer style, and then choose the handle layer and right click and choose paste layer style. That should have done it, I think =) Below is my finished picture |
|
|
|
|
| If you liked the above tutorial, fell free to leave a comment in my Guestbook. |
|